Configuring your own (custom) posts admin columns and show custom fields in Beaver Themer
To continue the search of some Do-It-Yourself routines for simple Custom Post Types and Custom Fields web applications, today we again focus on some back-end features to display both fields and taxonomies in the admin ‘All (custom) posts’ list columns.
The inspiration to do this manually came form the Dutch plugin-in developers of Admincolumns (David Mosterd en Jesper van Engelen), which can do everything described here and even so much more. But for a simple admin list columns view some lines of PHP code could easily be copied into functions.php or maybe a small plug-in with all the other CPT en CF definitions to make it all work together.
David and Jesper wrote a nice article (some years ago) with all the code needed to do basic things manually. The article was limited to custom fields only. To add custom taxonomies as well, a very old (2011) article from Justin Tadlock gave the answer to that question on how to do that, although there were some ‘character’ mistakes in the code he supplied.
A little bit of front-end as well
As you might know we do use Beaver Themer to get ‘everything done’ at the front-end level. Using custom fields however, does require some code added to Themer to get a list of the fieldnames. In the native version there is upport for ACF (the famous Advanced Custom Fields plug-in). For Pods and MetaBox add-ons have been developed to ‘connect’ to the field list.
If you ‘are on your own’, you normally would need to remember the fieldnames you defined. But ‘Carfty Beaver’ wrote an nice article back in 2017 (already!) how to connect your own custom field into Beaver Themer.
So, by combining the best of three article, we came close to a total ‘all-in-one’ solution for back- and front-end (together with beaver Themer) to build relative simple custom posts/fields based solutions for daily use.
What we did earlier
Please read the previous article (and look at the screenshot) on how we created the CPT ‘car’ based on the code generator from GenerateWP. With the post type ‘car’ some taxonomies have been created (like model, transmission, doors and colors) and some fields (like year, millage, price, name of seller and some more). By the way, always think through on how you use taxonomies compared to fields. Taxonomies are a good way to define data which are global to all CPT records, like ‘transmission’ or ‘number of doors’. ‘Millage’ however, or ‘name of seller’ are unique and therefore defined as fields.
So we created the following in one piece of code, either copy/pasted in functions.php in the Beaver Builder childtheme or just with some extra lines of ‘meta code’ as a plug-in:
- create custom post type ‘car’
- create taxonomy ‘model’
- create taxonomy ‘transmission’
- create taxonomy ‘doors’
- create taxonomy ‘color’
- create custom meta box ‘car info’ with the fields year, millage, cruise control (*), power windows (*), sunroof (*)
- create custom meta box ‘price’ with the fields car price, currency
- create custom meta box ‘seller information’ with the fields name, phone, address, private/company (*)
(*) these fields could have been defined as taxonomies in the example of GenerateWP, since these are ‘global’ values, but we left them as fields, as defined in the example.
Fields are a bit more complex to handle. For each metabox (with the defined fields) the following ‘things’ are needed to be done.:
- get the field values (if already there to edit them)
- define the default value (if needed) (mostly to ‘zero’ them at creation of a CPT record
- put the fields in a form for the back-end posts create/edit
- A bit in depth security stuff (not described in detail here): wp-nonce and sanitize the fields
- create the fields, if not there yet and/or update the content in the CPT record
Look at the GenerateWP example for more details and the code needed to get it all done
After this, we wanted to do two more things:
- adding the admin columns view for the post type ‘car’ in the back-end
- adding the fields to Beaver Themer
Admin columns basic setup
First you set up the column names for the admin columns view wit the following code:
// Make titles for the admin columns
add_filter( 'manage_edit-car_columns', 'my_edit_car_columns' ) ;

function my_edit_car_columns( $columns ) {

	$columns = array(
		'cb' => <input type="checkbox" />',
		'title' => __( 'Car name' ),
		'car_year' => __( 'Year' ),
		'car_price' => __( 'Price' ),
		'transmission' => __( 'Transmission' ),
		'date' => __( 'Date' )
	);

	return $columns;
}
‘cb’ is the checkbox to select the record to do ‘bulk actions’ as you are used to. The title is the standard WordPress field (as the title for each post or page), car_year, car_price are custom fields. And ‘transmission’ is one of the used taxonomies. This is just a basic example. Finally ‘date’ is also a standard WordPress ‘reserved field definition’ to display the creation date of the (custom) post.
You could add for example ‘doors’ and ‘color’ as taxonomies as well
There is not so much more to say about the code above. It is just how the columns names are defined in WordPress.
Now that we defined the column names, we need to fill them. In our case with just one example custom field (car_year) and one taxonomy (transmission). Update: we left price empty……
// Add the column content on a per CPT record base
add_action( 'manage_car_posts_custom_column', 'my_manage_car_columns', 10, 2 );

function my_manage_car_columns( $column, $post_id ) {
	global $post;


switch( $column ) {

    /* age of car */
    case 'car_year' :

        /* Get the post meta. */
        $year = get_post_meta( $post_id, 'car_year', true );

        /* if year is unknown */
        if ( empty( $year ) )
            echo __( 'Unknown' );

        /* You want to add something behind the year number? */
        else
            printf( __( '%s yourtext ' ), $year );

        break;

    /* Routine for taxonomy transmission. */
    case 'transmission' :

        /* Loop for taxonomies. */
        $terms = get_the_terms( $post_id, 'transmission' );

        /* if there is a vlaue */
        if ( !empty( $terms ) ) {

            $out = array();

            /* make it a click URL */
            foreach ( $terms as $term ) {
                $out[] = sprintf( '<a href="%s">%s',
                    esc_url( add_query_arg( array( 'post_type' => $post->post_type, 'transmission' => $term->slug ), 'edit.php' ) ),
                    esc_html( sanitize_term_field( 'name', $term->name, $term->term_id, 'transmission', 'display' ) )
                );
            }

            /* put a comma behind all taxonomies */
            echo join( ', ', $out );
        }

        /* if unknown */
        else {
            _e( 'Unknown transmission' );
        }

        break;

    /* end of all stuff */
    default :
        break;
}
}
The part ‘make it a click URL’ is a bit hard to understand, but it generates something like: https://xxxxxxx.nl/wp-admin/edit.php?post_type=car&transmission=automaat. It is a kind of filter and if you click on it the list displays only the records for that specific taxonomy.
Just have a look at standard posts and click on the categories there to see the structure of the URL. This is the way it also works for custom taxonomies.
Taxonomies are always defined as checkboxes. That is not always what you would like. Sometimes you would want taxonomies as radio buttons, just to select one option. For now it is beyond the scope of this article to do this manually. If you want this, install the plug-in ‘Radio Buttons for Taxonomies‘.
Final challenge: getting the fields listed in Beaver Themer
/**
* Register an action with 'fl_page_data_add_properties' hook
*/
add_action( 'fl_page_data_add_properties', 'demo_add_properties' );
function demo_add_properties(){
/**
* Add a custom group
*/
FLPageData::add_group( 'demo_details_group', array(
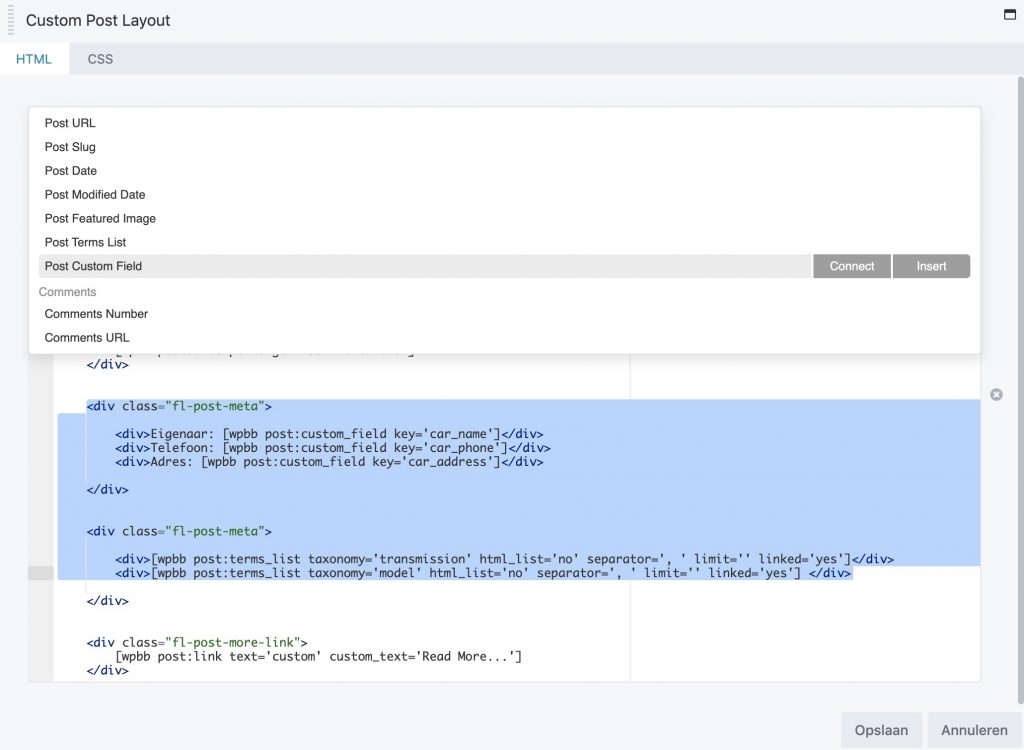
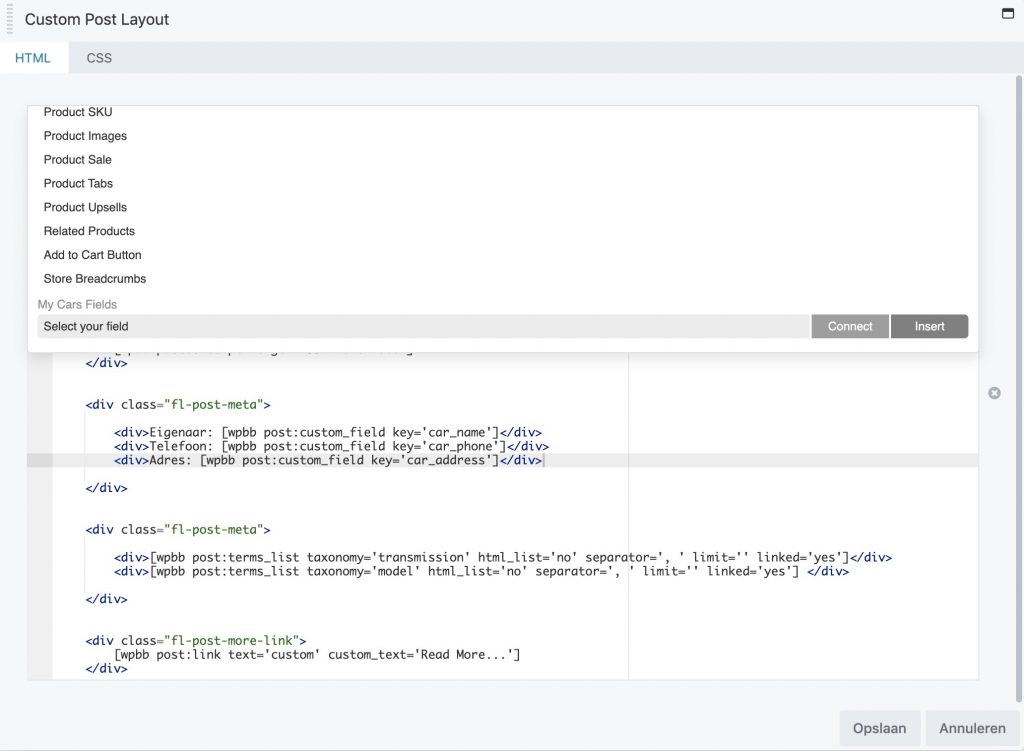
'label' => 'My Cars Fields'
) );
/**
* Add a new property to our group
*/
FLPageData::add_post_property( 'demo_details', array(
'label' => 'Select your field',
'group' => 'demo_details_group',
'type' => array('string'),
'getter' => 'demo_connection_getter',
) );
/**
* A list of the meta fields
*/
$meta_fields = array(
'car_name' => 'Current owner',
'car_phone' => 'Phone of owner',
'car_address' => 'Address of owner'
);
/**
* Settings option to pop up when our group is added
*/
FLPageData::add_post_property_settings_fields(
'demo_details',
array(
'key' => array(
'type' => 'select',
'label' => 'Select a Field',
'options' => $meta_fields,
),
)
);
}
/**
* Helper function to retrieve settings fields values
*/
function demo_connection_getter( $settings, $property ){
global $post;
if( '' == $settings->key ) return '';
return get_post_meta($post->ID, $settings->key, true);
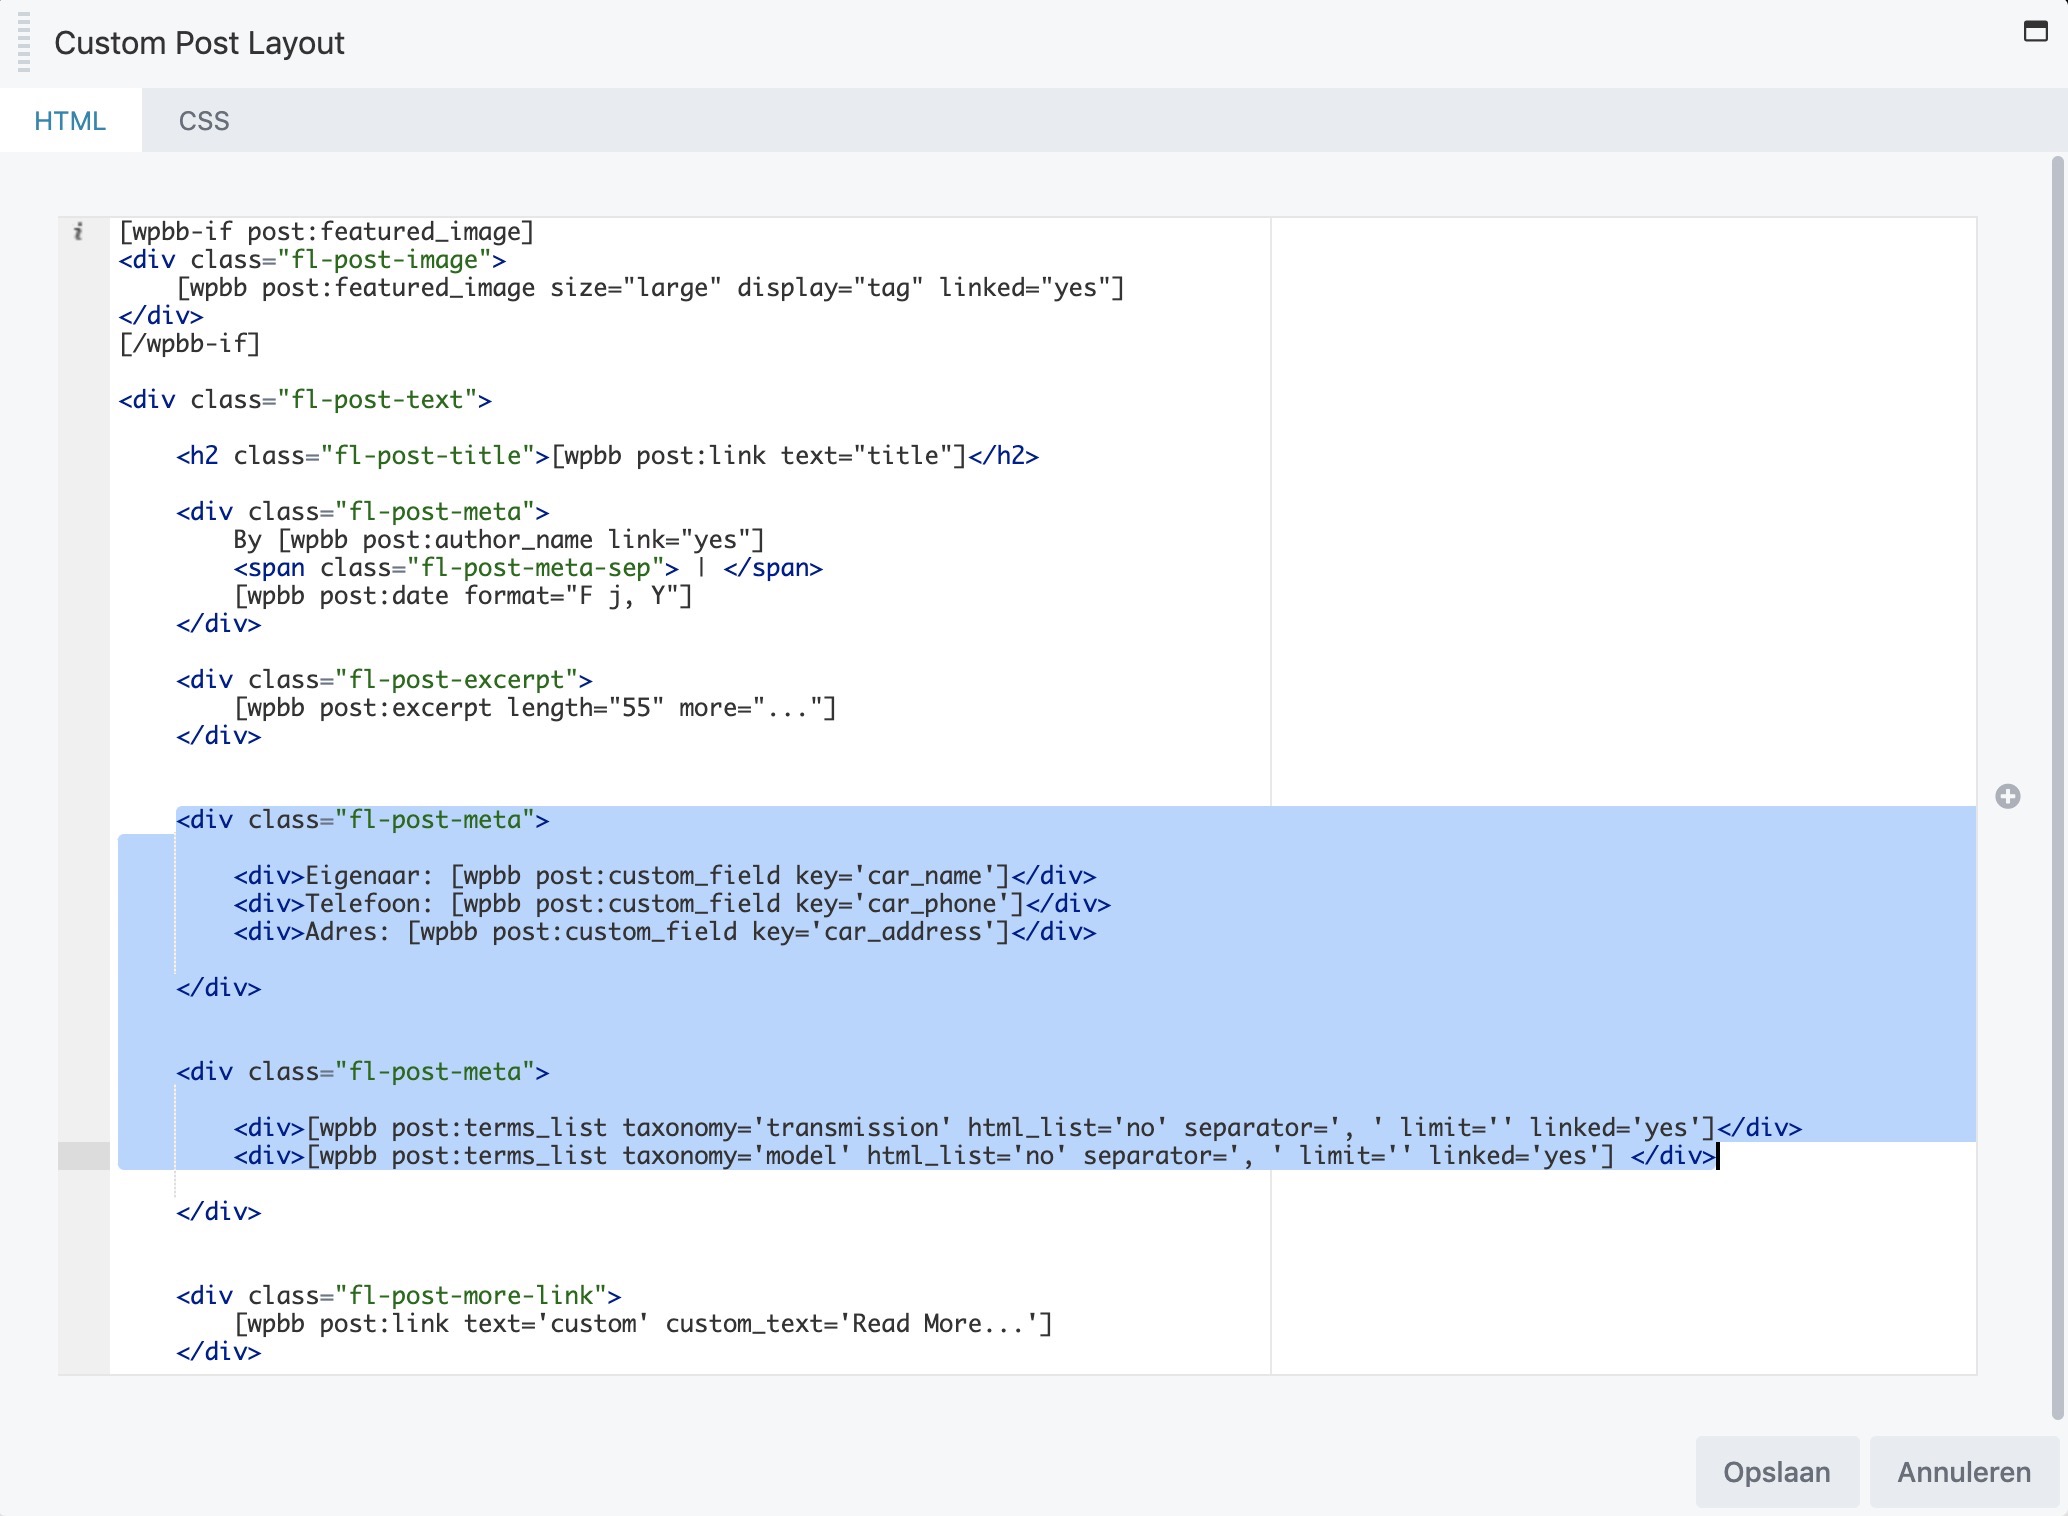
}With just some modifications in the code above we connected to some of the custom fileds we created. After this we were able to select the custom fields to ‘connect’ with.
Again, we do assume that you know how to use Beaver Themer to insert custom fields in your custom layouts.
Summary
With this tuorial we created a custom post types, a couple of fields, a couple of taxonomies, the column layout in the admin area for the posts list and the way to select fields in Beaver Themer to create layouts where we need the fields to be displayed.
Download ‘all of this’ in just one example plug-in.